|
|
Post by heem6 on Nov 27, 2009 20:20:05 GMT -5
Installed the new Fender Deluxe neckplate and screws. Used toothpicks in each of the body screw holes to get the tightest fit possible. Went out to Sam Ash to get a Fender 5-way Selector Switch, strap buttons and a pickup ring. Got everything but the pickup ring.
Came home ready to start wiring and my dog had a big wet spot on her shoulder. So I checked it out and it's this giant red lump. Call vet, drive back to the vet's (right next to Sam Ash, where I JUST CAME FROM) and it turns out it's just a bee or wasp sting or something. I was really concerned cause I just spent $1,200 having a lump removed that looked kinda like this.
Got home (AGAIN) and got ready to wire and ... the neck has this yucky Fender Glossy / Maple Syrup finish on it. So I watched a movie and sanded all the finish off. I'll tung oil it tonight and put it on tomorrow and then do the wiring.
[/size][/color] 
|
|
|
|
Post by heem6 on Nov 28, 2009 0:34:46 GMT -5
Got the neck aligned and installed. Still needs to be adjusted but already playing well. Tomorrow will be wiring day.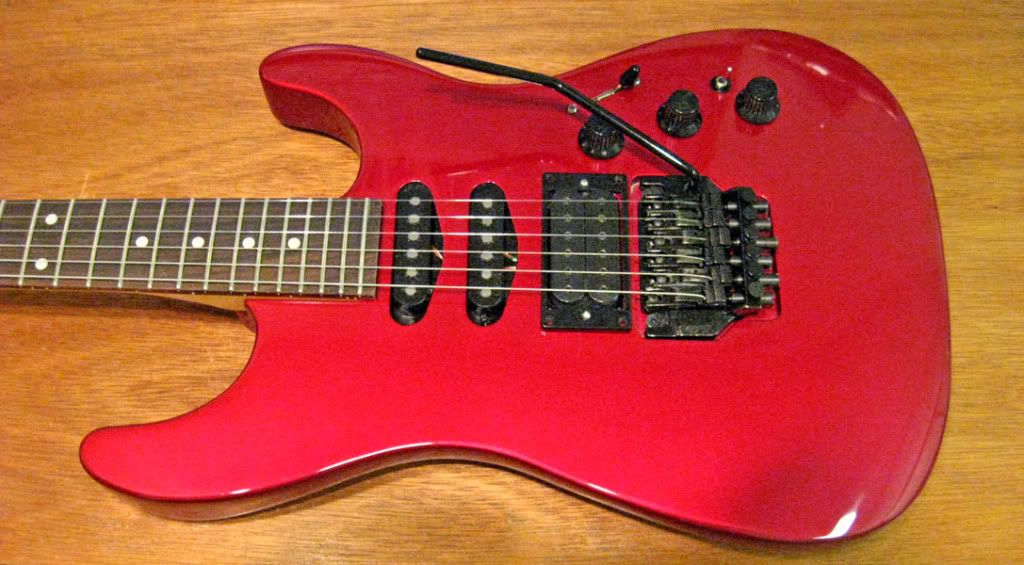 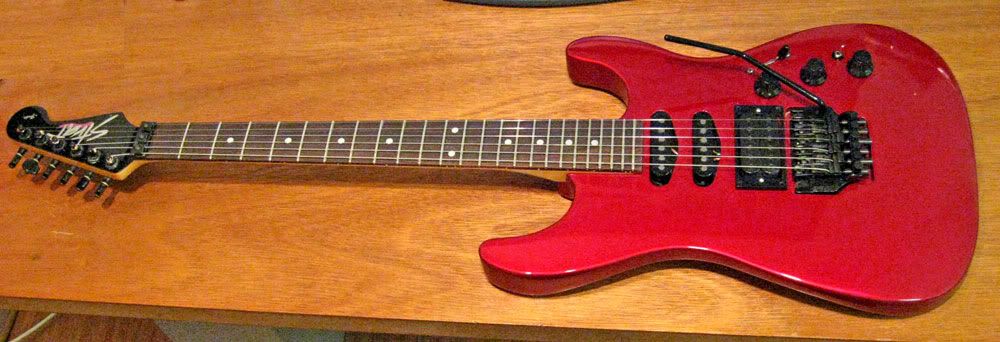
|
|
|
|
Post by spacerocker on Nov 29, 2009 11:18:51 GMT -5
Looking really good!
|
|
|
|
Post by heem6 on Jan 10, 2010 21:41:38 GMT -5
Went to the Ace Hardware today and found screws to fit the selector switch for this guitar. Met a guy there who is a guitarist as well and he was saying how much he liked the Danny Gatton Teles. Came home and started wiring. Of course, there's differences in the diagram and in reality. My selector switch has 8 contacts instead of the 6 shown in the diagram.
Anyway, I got it partly wired up and plugged it in. Woo-Hoo! I have sound! The volume and tone controls don't work yet, but I planned on this taking several tries before it's right.
Here's a picture of the wiring job so far (I know there's a lot of lead) and some shots I took of it earlier today.  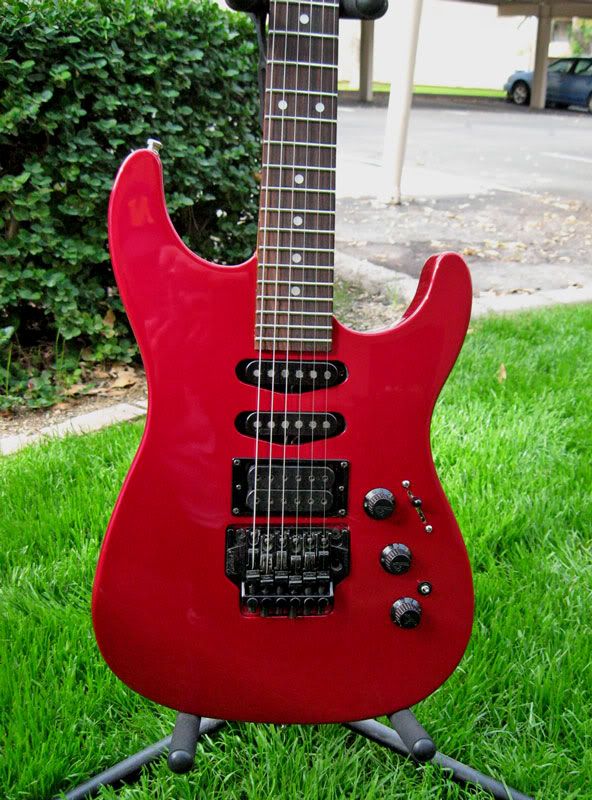 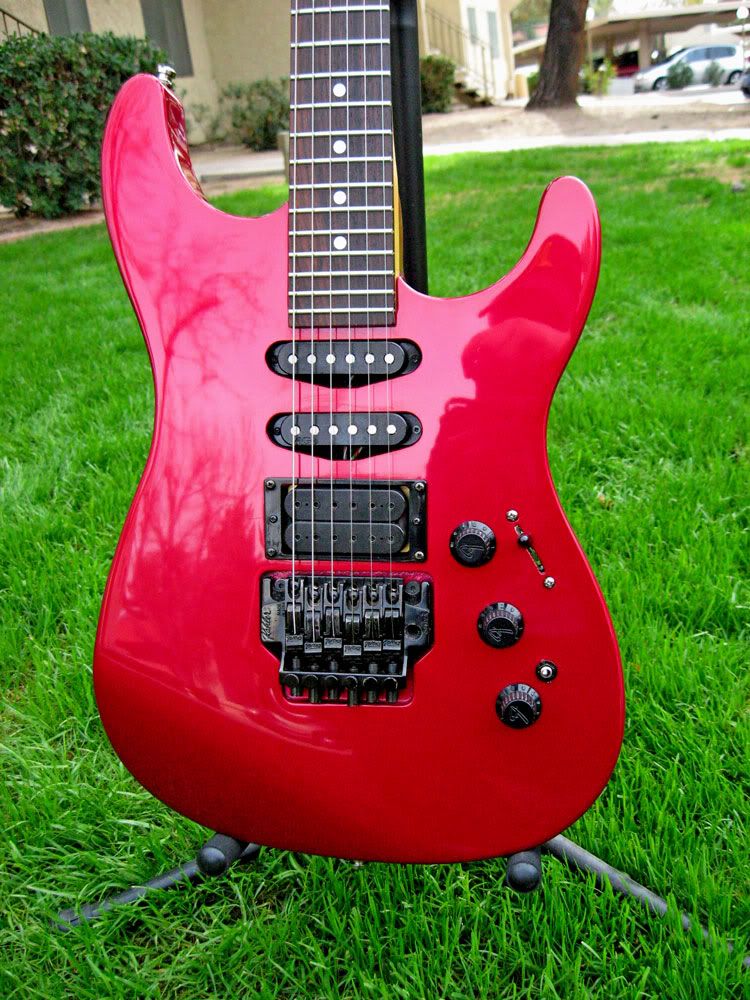 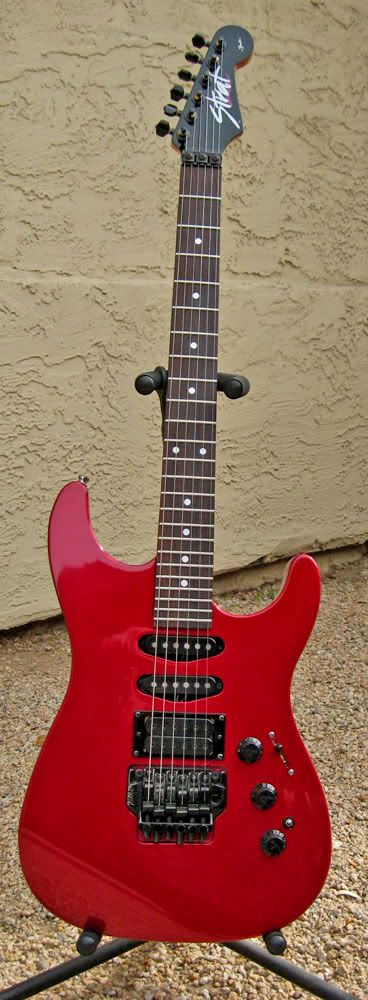
|
|
|
|
Post by nickwellings on Jan 11, 2010 9:09:25 GMT -5
Looks great Jim! Really factory fresh and brand new.
To "fix" your wiring,
All you have to do is number the terminals from left to right for ease of reference:
1 2 3 4 4 3 2 1.
1 is bridge hot,
2 is middle hot
3 is neck hot.
Join both 4s together with a tiny wire or solder bridge. And run a wire off that to the input of the vol pot.
Then the next "3" would be middle TBX, and 4 would be bridge TBX. Or rather, your normal pots in that pic. You can also use the Seymour Duncan diagrams or any others to help with the HSS non TBX layout.
|
|
|
|
Post by heem6 on Jan 12, 2010 0:08:57 GMT -5
Nick, you're the man! I may email you some questions as I try to finish this but I really, truly appreciate the help here!
|
|
|
|
Post by nickwellings on Jan 12, 2010 7:25:21 GMT -5
I think I told you wrong on the bridge TBX BTW. Oops! Middle goes to 2, and bridge goes to 1 on the right. I totally confused myself with the numbers. SORRY! EDIT: I just viewed the diagram again: 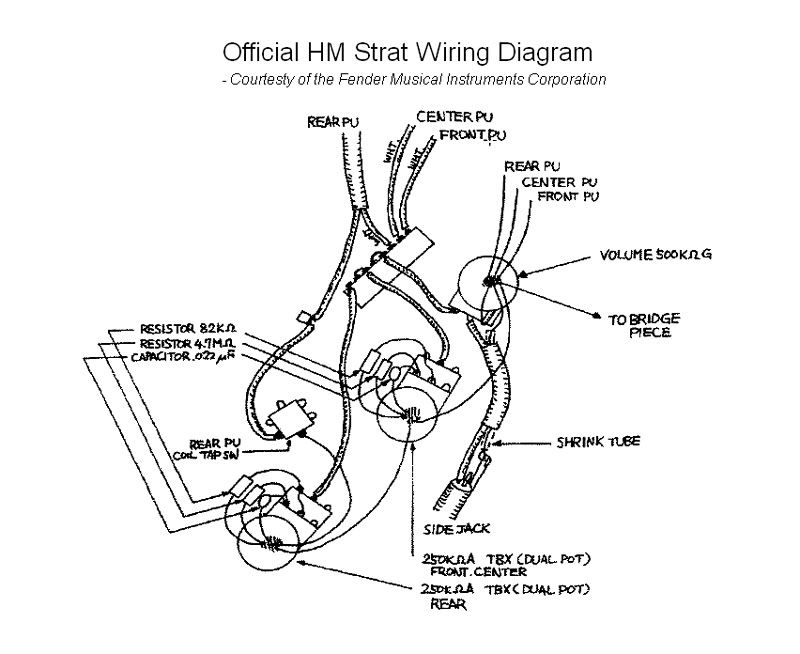 And it does have 8 lugs like the import switch on our HMS...you just have to look very closely! ! Two lugs are joined together on it. Both 4s, and the right hand side's 3 and 2. |
|
|
|
Post by heem6 on Jan 12, 2010 9:22:17 GMT -5
Oh yeah, I see all 8 lugs now. Cool. Now I feel much more confident proceeding.
I'm doing the TBX mods on this one and will post soundfiles when I get it completed.
|
|
|
|
Post by nickwellings on Jan 12, 2010 19:18:32 GMT -5
Cool! On a side not, the DP/DT switch they show is nearly impossible to get hold off with the lugs all arranged in a square) but it doens't matter as any type of locking DP/DT will do.
The 8 lug switch is often called an "import switch" as you prolly know. More evidence, for me that the HM was only ever made in Japan.
The diagram shows a 4.7M resistor but modern day TBXs don't use it. Don't think they ever did! I'll look into getting one and trying it. Normally it's 82K res and the cap. Or with doc's mod a 220k res.
|
|
|
|
Post by heem6 on Mar 20, 2010 20:57:34 GMT -5
Well, I got it about 70% wired and it wasn't working so I brought it down to the shop today and they figured out the switch was bad. Didn't have time to replace it, but will have it done Monday afternoon.
|
|
|
|
Post by Bodaggit23 on Mar 21, 2010 0:39:37 GMT -5
That is a beautiful guitar.
I'd love to find a body in that shape, or close, to replace my white one.
|
|
|
|
Post by heem6 on Mar 22, 2010 23:39:32 GMT -5
Thanks, Bo! I brought it home tonight and the Super 3 sounds great! The two single coils were pretty good, but really needed for the height to be adjusted. As I was tightening down one of the single coil screws (with rubber foam under the pickup) I heard a crack and the "leg" snapped off the single coil! Crap! I'm going to email Jeff Lace and see what he suggests. Meanwhile, I got the neck conditioned, did an eyeball intonation on the bridge, shimmed the neck (screw that neck tilt adjustment dealybob) and it seems to be sitting at just about the right angle now.
Tomorrow I will pick up some tin foil to shim the bridge saddles with and hopefully I'll get an answer back from Jeff Lace by then. I've heard Lace has fantastic customer service so I'm optimistic.
|
|
|
|
Post by Bodaggit23 on Mar 23, 2010 6:30:13 GMT -5
I used pieces of a Diet Mountain Dew can to shim the nut on my purple HM. It took 8 pieces!  |
|
|
|
Post by heem6 on Mar 23, 2010 10:57:43 GMT -5
Eight pieces? Really? That seems like it would be a really thick shim to start with!
I had a chance to plug this guitar into my Roland Cube last night (and this morning)! It has a dynamite emulation of a Roland JC-120 built into it. Combining the Super 3 and the middle Holy Grail produced this lush tone very similar to the clean guitar parts in Great White's "Rock Me." Since this is one of my favorite clean rock tones of all time, I was thrilled and could not stop playing it!
I am a convert to the TBX control. This is the first chance I've had to play with one. The tone options are endless between that thing and the coil split. I like to think of it was a tone control that can remove brightness but can also add brightness. I did the Doc's mod and it sounds great. I don't have anything to compare it to but I really like it.
|
|
|
|
Post by heem6 on Mar 23, 2010 14:40:52 GMT -5
So I called the guitar shop and here's what we came up with -
I bought a Rubbermaid black rubber trashcan awhile back to use to carve electronics cavity covers out of. So I'm going to carve a piece or two out of that which will fit on the bottom side of the pickup. I'll use it as a "splint" to hold the broken piece in place during and after gluing it. It will also hopefully provide enough "lift" to get the pickup to the proper height.
I'll post some sound samples soon.
|
|
 />
/>
 />
/>